TUTORIAL
GETTING STARTED
8WPH stands for 8th Wall Project Hosting. 8th Wall Project Hosting. It's a website where you can easily manage your projects and expose them to the web. In this section, you will learn how to set up your first project.
EXPORTING YOUR PROJECTS
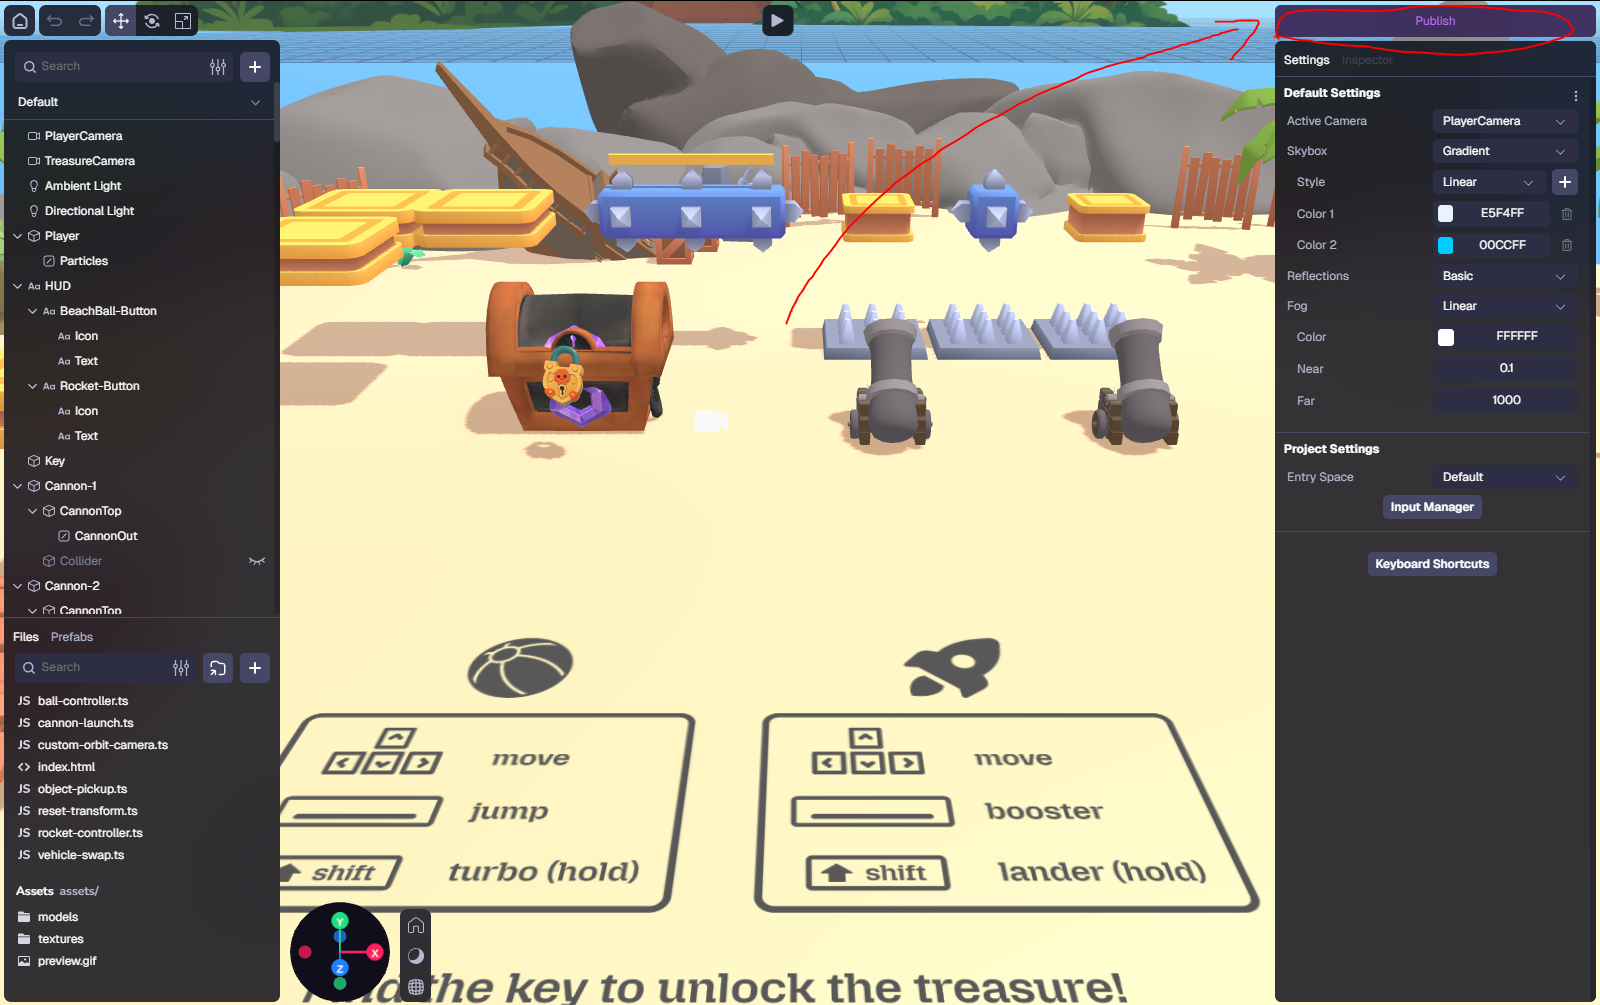
To export a project from the standalone app, click on Publish in the upper-right corner of the editor.
The following menu will open. Click on Build and you will be prompted to choose a location to save the project exported as a static website.
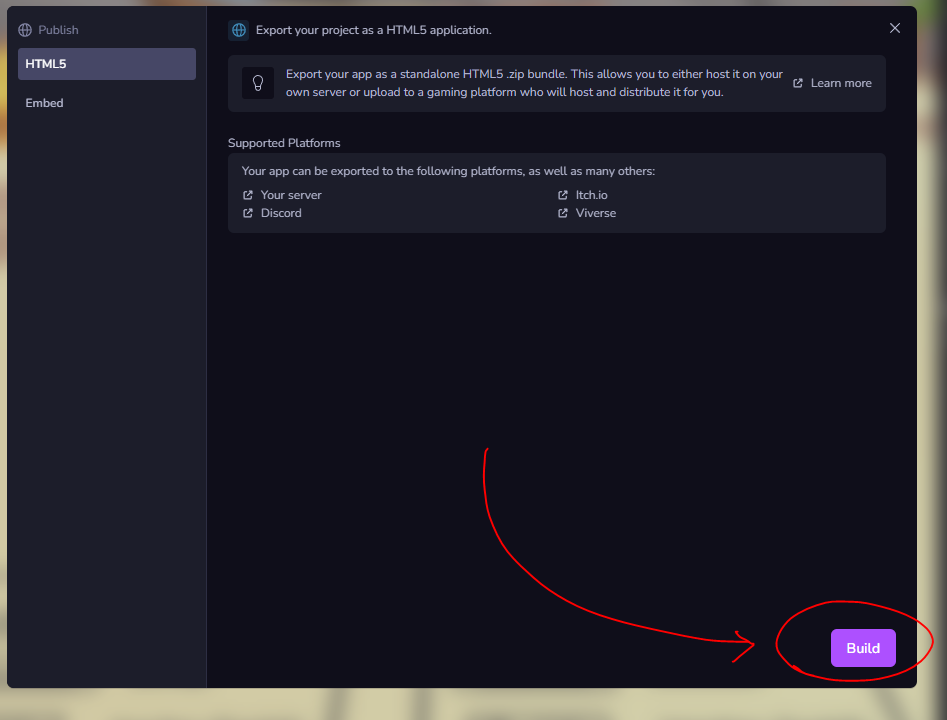
Once you export the project as a zip file, we're ready to upload it here.
UPLOADING YOUR PROJECTS
Once you have the zip file of your project, you can upload it here to have it exposed to the web. Be careful! This website only supports zip files exported from the 8th Wall standalone app.
First, go to My Projects. Then, click on Create project. Choose a name and a slug, upload your zip file and click on Create Project.
You can name your project whatever you want. However, the slug must be unique, since it will be used as the URL from which your project will be accessed later.
MANAGING YOUR PROJECTS
Congratulations! You have now uploaded your first project. Now it's time to learn how to manage it.
States
- Running: The project is live and can be publicly accessed from its designated URL.
- Stopped: The project cannot be accessed from its URL and is not publicly accessible.
To change between states, click on the corresponding button.
Deployments
A project can have multiple deployments over time, such as when you upload a newer version. The dashboard keeps these deployments under the same project and lets you choose which one is publicly accessible.